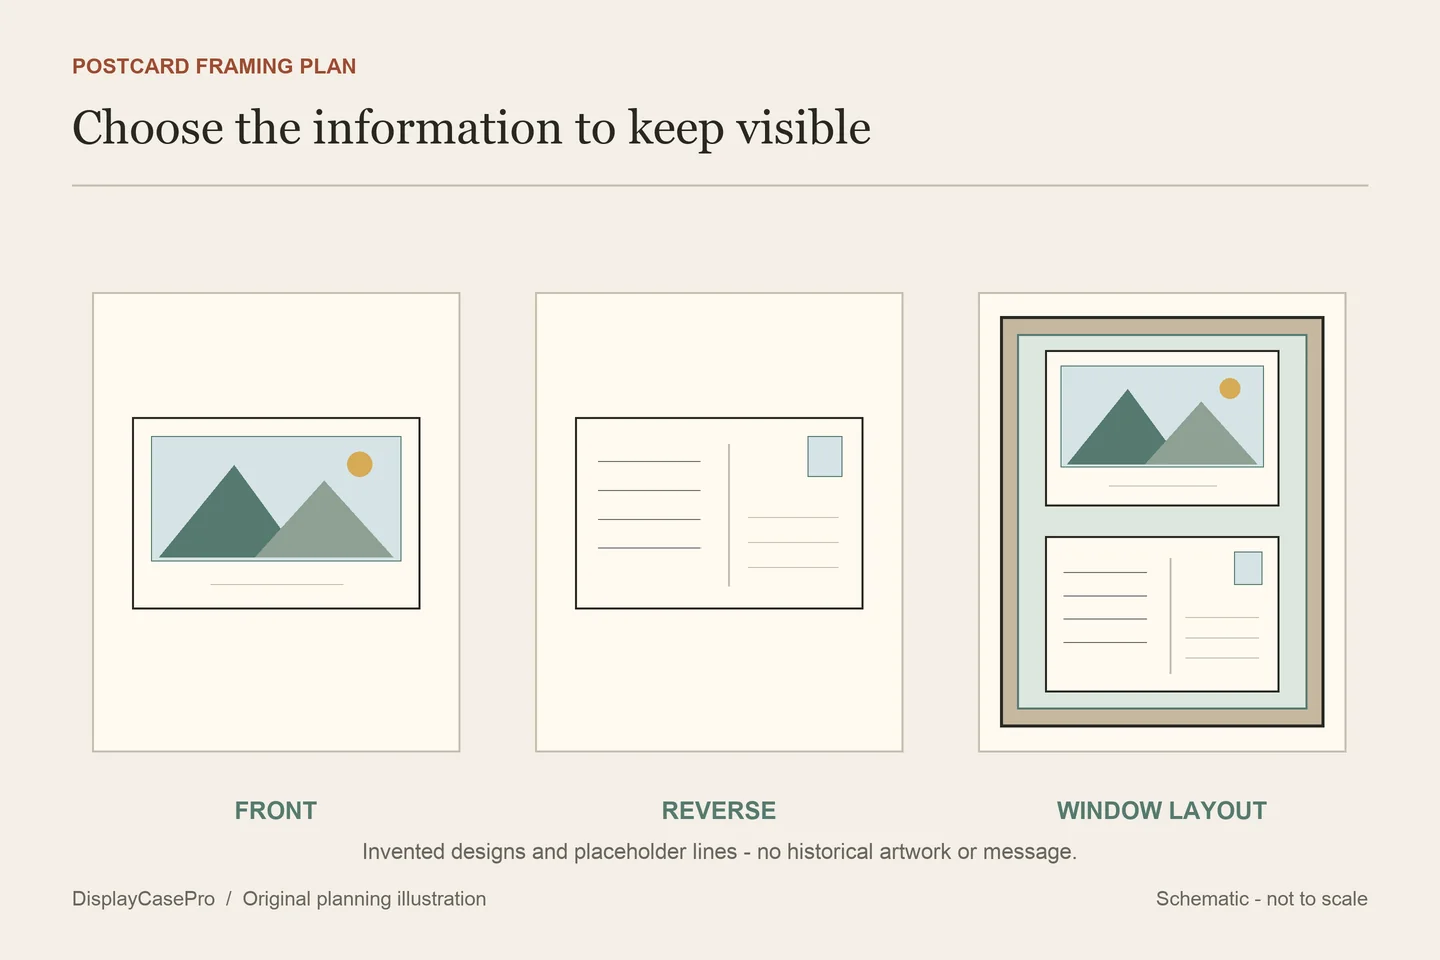
Frame a postcard by deciding what you want to keep visible: its image, complete edges, handwritten message or the relationship between several cards. Measure the actual card, plan the window around those details and choose a suitable mount before buying the frame. Keep collected originals intact.
Choose the front, the message or a display copy
A postcard has more than one possible subject. The front may carry the view you collect; the reverse may hold the date, handwriting or postal details that explain why the card matters. Make that choice for each card before composing a group.
| Viewing goal | Presentation route | Keep in the record |
|---|---|---|
| The image and caption | Front-facing original with a planned mat window. | A reference to the reverse and any information hidden by the mount. |
| The entire front, including edges | A full-edge presentation with a mount specified for that view. | How the card is supported and how it can be accessed later. |
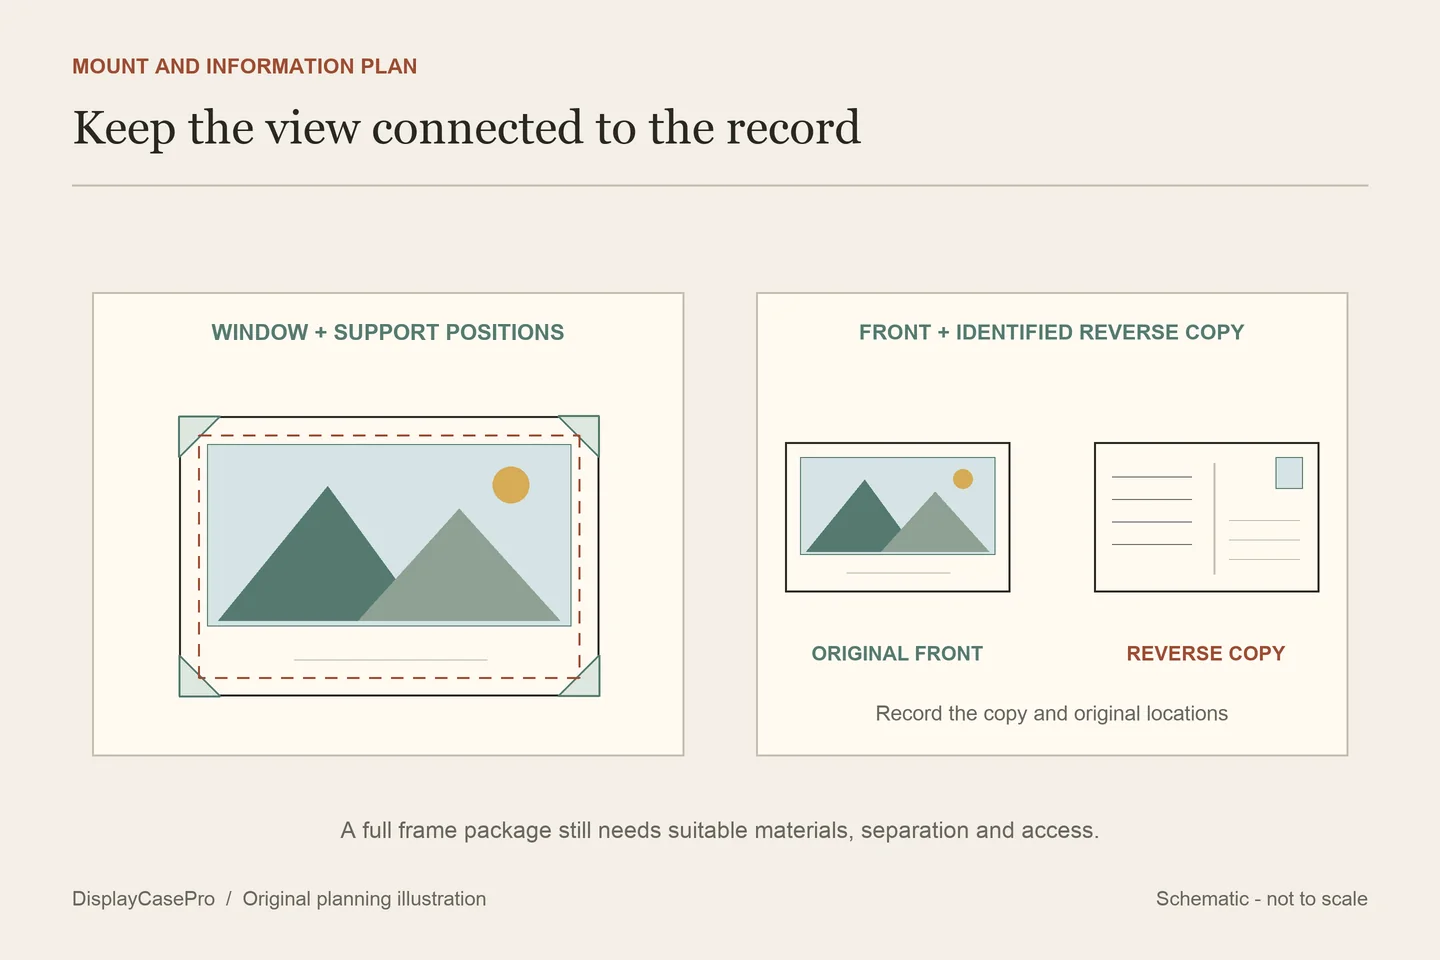
| Front and written message together | One side of the original plus a clearly identified reproduction of the other, or a pair of display copies. | Which image is a copy and where the original is housed. |
| A changing two-sided study | An accessible frame arrangement designed with a framer, or display copies alongside an independently housed original. | The opening and return procedure, without relying on routine improvised handling. |
For a collected original, long-term display also needs an exposure decision. The Library of Congress matting and framing guidance explains that light can damage works on paper and suggests reproductions as a display alternative. A copy can show a favorite view while the original remains separately housed. Mark the copy’s status in the caption or collection record.
If a reverse is the main subject, frame that side deliberately rather than hiding it behind an unrelated front image. A concise label can connect the visible message to the card’s documented place or date without inventing missing context.
Measure the actual card, then plan the visible area
Record width and height in the intended orientation. Include irregular, deckled or damaged edges in the outline. Keep those observations separate from any condition assessment by a framer. Do not trim the card to make it agree with a nominal frame size.
A named modern product illustrates the limits of size assumptions: National Park Posters describes its own postcards as 4 × 6 in. That figure belongs to those cards. It does not establish the size of a vintage postcard or the visible window in every frame labeled 4 × 6.
On a paper outline or existing reference image, mark the front details that must remain visible: a printed border, publisher line, caption or handwriting. Then draw the proposed mat opening. The opening should satisfy the viewing goal and work with the chosen mount; its relationship to the card’s edges needs to be planned explicitly.
- Card dimensions: the complete paper object.
- Visible window: what the viewer sees through the mat and frame.
- Mounting area: where the support receives the card.
- Frame package: the assembled glazing, mat, support and backing.
Ask the frame supplier which of those a size label describes. A border that disappears in a paper layout will also be missing from the planned view, even if the frame otherwise accepts the package.
Choose support for the original, not just a frame style
A window mat and a full-edge or “float” presentation describe different appearances. Neither term completely specifies how the postcard is held. Ask for the mount and contact materials as part of the framing plan.
The Library of Congress corner-mount guidance describes paper and polyester corners that can support suitable works without adhesive on the object. Corners cover some edge area, so their positions must be considered in the view. It also notes that adhesive from commercial corners can creep onto the reverse. “Self-adhesive” alone is therefore not a sufficient specification for a collected card.
If slight edge coverage is acceptable
Discuss suitable corners or another intended nonadhesive support with the framer. Check the location of the supports against the front details you marked. The card should not become the adhesive attachment surface. Identify the actual product or construction and its use conditions rather than choosing by an archival label alone.
For a card in suitable condition, this can be a useful route to discuss when a bordered front is the subject. A fragile edge, unstable coating or other condition question needs individual advice; the fact that another card fits a corner does not resolve this one.
If every edge must remain visible
Ask the framer how the full-edge presentation will support the actual card and allow later access. Keep that mount design separate from the desired appearance. Do not substitute tape, putty or glue on the card just because the attachment will be hidden from the front.
A two-glass frame also needs a support and separation plan. Seeing both sides through transparent panels does not establish that clamping the original between them is appropriate. If a suitable two-sided arrangement is impractical, a clearly identified reverse image beside the front offers another way to show the information.
Use a paper layout for multiple postcards
Choose one organizing idea: a documented trip, a place over time, a correspondence or a visual theme. Preserve each card’s own identity. Similar-looking scenes do not prove the same date or publisher, and an uncertain date should remain uncertain in the caption.
- Make labeled paper shapes. Use each card’s actual dimensions and mark its chosen orientation, visible details and ID. Keep the originals separately housed during layout trials.
- Set the reading order. Put a dated sequence in its documented order, or use a clearly described visual arrangement. Include front and reverse-copy roles where relevant.
- Draw each opening. Test the mat-window plan for every card, particularly an irregular or smaller one. An evenly spaced group does not require identical window sizes.
- Give captions their own space. Keep an image caption, postmark or signature visible if it belongs to the viewing goal. Put added information outside the card.
- Review the complete plan. Check card positions, mount locations and access with the framer before the multi-opening mat is made.
For a mixed-size collection, a common outer frame or repeating label style can create continuity while individual windows follow the cards. If several separate frames are planned, resolve each package first; use the collection wall layout guide for their arrangement on the wall.
Specify the complete frame package and access
The Library of Congress recommends a chemically stable framing package and separation between paper and glazing, using a window mat or spacers as appropriate. The frame must accept the complete package’s depth. Confirm these details with the chosen framer rather than making the card fit by compressing the assembly.
Ask for a written description of the mount, mat/window dimensions, glazing separation, backing and opening method. Also record what future reverse access involves. If looking at the reverse requires removing the whole package, decide whether a reference image would serve that recurring task more conveniently.
Use the blank postcard framing worksheet for each card and position. It separates front details, reverse records, actual dimensions, mount, visible window and copy status. The usable-depth guide explains why the finished mounting and glazing faces matter when a deeper frame is used.
Choose the display location with the original’s exposure in mind, avoiding direct sunlight and heat as the Library of Congress advises. Framing is one part of that decision; a product’s UV description does not make indefinite display harmless.
Common postcard framing questions
Will a standard postcard frame fit?
Confirm the actual card, visible opening, mount and package depth. A nominal size does not answer all four, and historic cards can differ from the modern example above.
Can I show the message without handling the card repeatedly?
A documented reverse image can sit beside the displayed front or in the collection record. Clearly identify it as a copy. If direct access is essential, specify that need when arranging the mount.
Should I trim a card for a collage frame?
Keep the collected original intact and adapt the window or composition. A suitable display copy offers more flexibility when a fixed collage format cannot accommodate the original.
About this guide: This is a framing-planning guide drawing on the named primary paper-care sources and one attributed contemporary size example. It does not authenticate postcards or certify a ready-made frame or mounting product.
Comments
Share a display tip or ask a question.