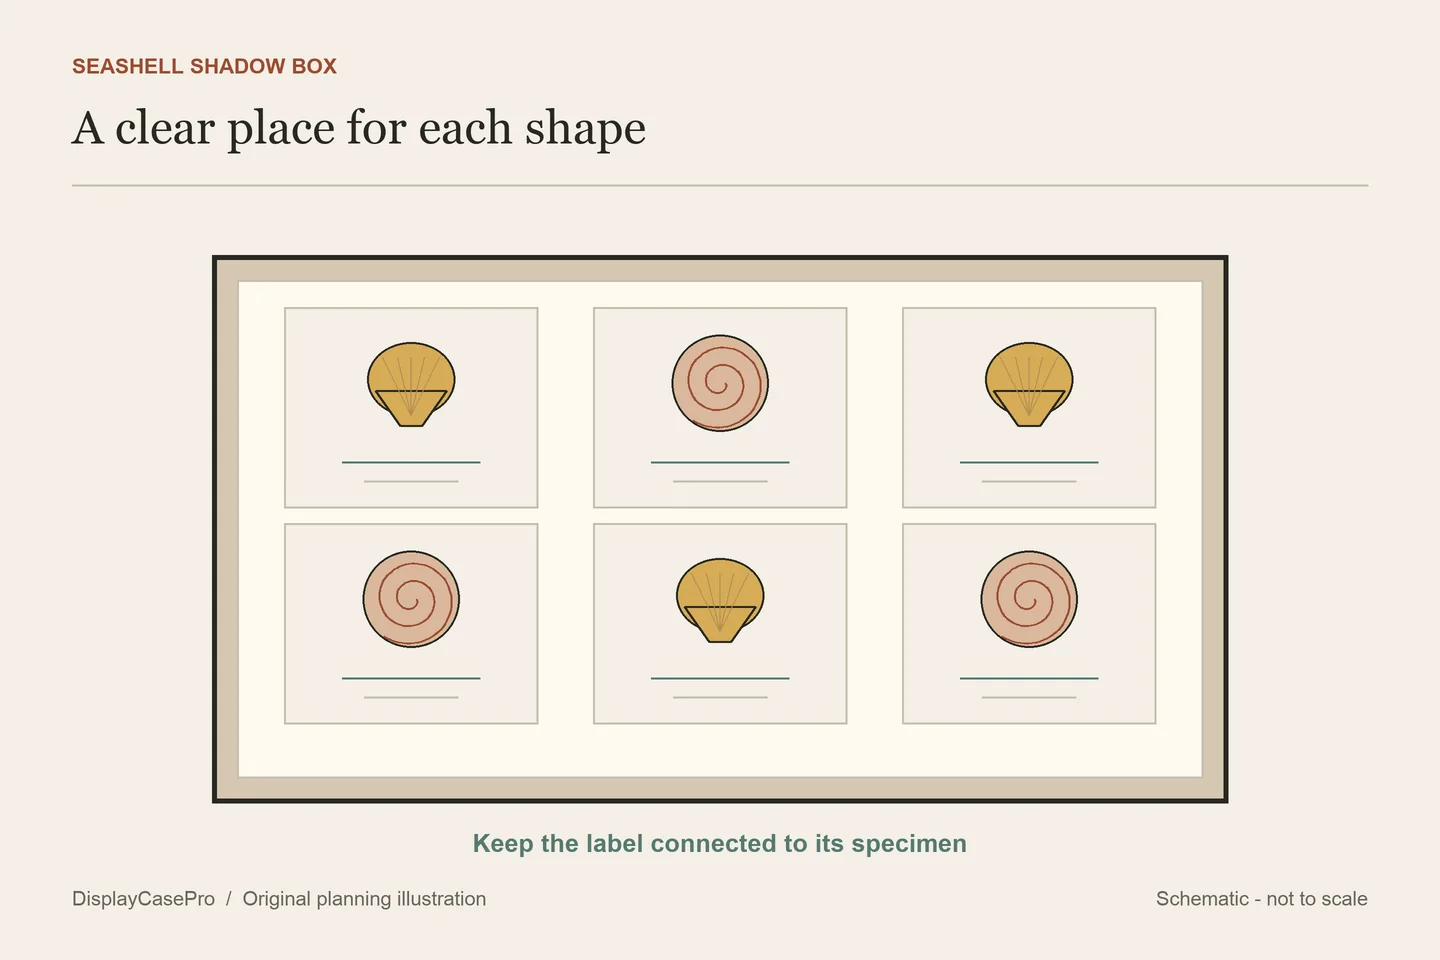
To display seashells in a shadow box, choose a layout while the shells are still loose, match the mounting method to their condition, and check the depth with the supports included. Decide at the start whether you are making permanent decorative art or a collection that must remain removable.
That decision changes the materials you need. A glued souvenir collage can be a craft project, but it is not the same as housing labeled specimens. The steps below offer three concrete layouts and two mounting routes, without assuming every shell can tolerate glue, cleaning or pressure.
1. Choose between a decorative collage and removable specimens
Spread the shells on a supported work surface and separate sound, replaceable craft material from fragile or important pieces. Look for projecting spines, thin edges, existing repairs and loose fragments. A box that fits a chunky spiral shell may still be a poor home for a delicate shell beside it.
| Your priority | Suitable direction to investigate | What to avoid assuming |
|---|---|---|
| A permanent decorative composition using expendable craft shells | A secure decorative backing and an adhesive compatible with the identified shell and backing materials. | That a popular craft glue is reversible or suitable for important specimens. |
| Access to original specimens and their identification | Individual compartments or fitted, removable supports in a stable enclosure. | That filling gaps behind the shells will safely clamp them against glass. |
| A fragile, repaired or significant shell | A purpose-made support with appropriate collection-care advice. | That a hidden dab of glue or a tight wire loop is harmless because it is difficult to see. |
A removable collection can also look deliberate. Repeated compartments, one consistent label position and a limited number of specimens make a clear composition without fixing every shell permanently to a board.
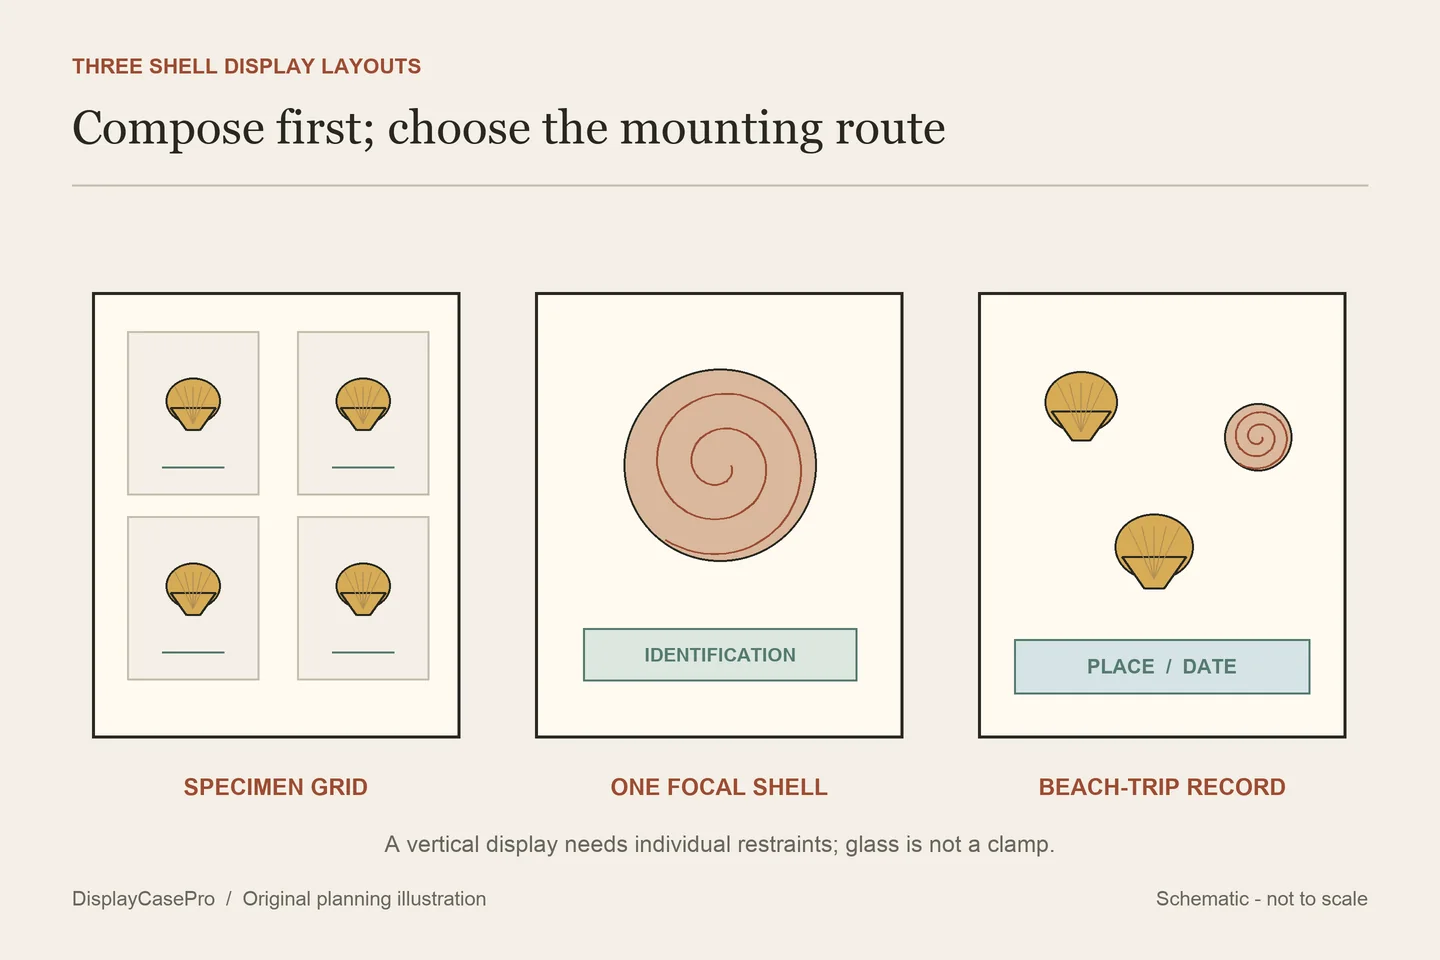
2. Test three seashell shadow box layouts
Cut a sheet of paper to the visible opening and mark the border hidden by the frame. Arrange paper outlines first when the shells are delicate. Photograph each version from the intended viewing direction; a layout that works on the table may read differently at eye level.
A specimen grid
Give each shell its own visual cell, with a label beneath it. Align the label baselines rather than forcing differently shaped shells to share one bottom edge. Put a taller spiral near another strong shape so the grid feels balanced without pretending the objects are identical.
This works well when you want to compare form or keep identification visible. Leave a larger cell for an awkward specimen instead of rotating it into a strained support just to preserve a perfect grid. You can leave some cells empty for future additions.
A single-shell focal display
Choose one shell with a shape worth seeing clearly. Set it off-center on the paper plan and place a small caption in the remaining space. Try a second plan with the shell centered and the caption below. Compare them from the room, not only from above the table.
The support and background should reveal the shell's outline. If a dark opening disappears against a dark backing, try a lighter background. If projecting spines become hard to distinguish, simplify the composition instead of filling the surrounding space with smaller shells.
A beach-trip record
Divide the box into a shell area and a separate information area. A copied photograph, a simple coastline sketch or a place-and-date caption can explain the trip. Keep each shell associated with its record; specimens from several locations should not be mixed under one location label.
Use a printed sand-colored background if you want a beach effect without loose grains moving around the contents. Objects such as pebbles and sea glass need their own supports too. A large stone should not be able to roll into a thin shell when the box is handled.
3. Choose the enclosure, backing and clear depth
Match the layout to the usable opening and the deepest shell-plus-support profile. A shell's longest dimension may run sideways while its thick spiral projects toward the glass. Measure both. Our shadow box depth guide explains which interior reference points to request.
For important specimens, enclosure chemistry matters as well as appearance. The Canadian Conservation Institute's natural-history guidance warns that organic acids from wood products can damage shells. It also describes individual supports, separation and smooth, non-snagging materials for vulnerable specimens. A decorative wood box should not be assumed suitable for long-term specimen care.
Ask for the materials of the interior walls, backboard, lining and supports. A layer of linen does not by itself demonstrate that emissions from a hidden board have been controlled. If the enclosure materials cannot be established, choose a specimen enclosure with documented materials or reserve the decorative frame for replaceable craft pieces.
Mark the final orientation on the plan. A flat tray with separated compartments may work horizontally, but turning it upright changes how every shell is supported. Do not hang a tray vertically unless its individual restraints and enclosure are designed for that position.
4. Assemble the route you chose
For a decorative collage
- Finish the layout first. Number the positions on a separate paper plan. Keep the largest shells clear of the frame lip and check that the backing can support the whole composition.
- Identify the materials. Select an adhesive for the actual shell and backing combination using the adhesive maker's instructions. An unnamed “strong glue” is not a specification.
- Test expendable material. Use a spare craft shell and a sample of the backing. Check for visible marks and whether the proposed joint works in the final orientation. Do not test an important original in a hidden spot.
- Work without forcing the shell. Place it in a stable position with its fragile edge free of pressure. Follow the product's application, ventilation and curing requirements; different adhesives do not share one drying time.
- Check the completed backing before framing. Follow the frame and adhesive instructions for handling. If a shell loosens, revise the support rather than closing the glass against it.
This route creates decorative art. It does not promise reversibility, indefinite adhesion or museum preservation. If those qualities matter, use a different mounting approach.
For removable specimens
- Start with a stable specimen tray or fitted enclosure. Give each object its own compartment or appropriate support so neighboring shells cannot strike it.
- Fit support around robust areas. Leave thin lips, spines and existing repairs free of pressure. A support that holds an intact chunky shell may be unsuitable for a thin-walled example.
- Keep the record with the shell. Place a separate label in its compartment and connect it to the inventory. Avoid attaching sticky labels directly to the shell.
- Check access. Establish how to lift or remove the supported object without grabbing a projection. Get a custom mount for a vulnerable shell that cannot be handled safely this way.
- Use the intended orientation. For a wall display, have the mount securely retain each shell independently of the glazing. A pressure-packed box of loose shells does not meet that requirement.
5. Add useful labels and an inspection record
Record the collection location and date where known, the source if purchased, and an identification only as specific as you can support. “Identification not confirmed” is better than a guessed scientific name. An attractive arrangement can keep this information discreetly visible or in a connected inventory.
Use the seashell layout and provenance worksheet to connect each shell with its position, support and record. Photograph the finished display and retain the source information separately as well.
Place the display away from direct sunlight and inspect it for movement, loose fragments or a new powdery surface. Some shell pigments are light-sensitive. A new deposit should prompt a collection-care assessment rather than an automatic wipe-down or another coat of adhesive.
Common questions
Can I use hot glue?
It may be a craft option for expendable material when the specific adhesive and backing are compatible, but it is not a universal shell mount. Joint strength and removability are different questions. Do not use an important specimen to discover whether the glue works.
Do all shells need bleaching before display?
No universal bleaching recipe belongs in a display plan. Condition, natural surface and previous treatment differ. This guide assumes dry, prepared specimens; seek appropriate care advice for an unidentified, dirty, repaired or deteriorating shell.
Can I make the display without glue?
Yes, with suitable compartments or fitted supports. For a vertical display, those supports must retain the shells in that orientation. Do not use the glass as the missing restraint.
Comments
Share a display tip or ask a question.