Frame a photograph by measuring the physical print, deciding which image and border must remain visible, and choosing a suitable mount, glazing and frame together. Check the print process and whether you are displaying an original or a replaceable copy. A frame’s size label alone cannot settle those decisions.
Start with the photograph you will actually put in the frame
Identify the photographer or printer where known, the printing process, paper or other support and any applied finish. Distinguish a loose paper print from a photograph already bonded to a rigid panel. A glass plate, a mounted object or a damaged historic photograph needs a different assessment from a recent loose print.
Keep existing labels and information about signatures, edition marks or notes on the reverse. Record curls, tears, old tape or a surface attached to old glazing before opening or remounting. Do not treat flattening, surface cleaning or removing an old bond as routine frame preparation.
For a unique family photograph, consider displaying a suitable copy while retaining the original in appropriate storage. The National Archives recommends copies to limit light exposure of originals. Decide this before altering a valuable print to fit a frame.
Rise Art’s photography guide sensibly starts with selecting the picture before its surround. For a physical print, take that a step further: choose the actual printed version and its border. A phone screen’s image proportions do not tell you what the lab has supplied on paper.
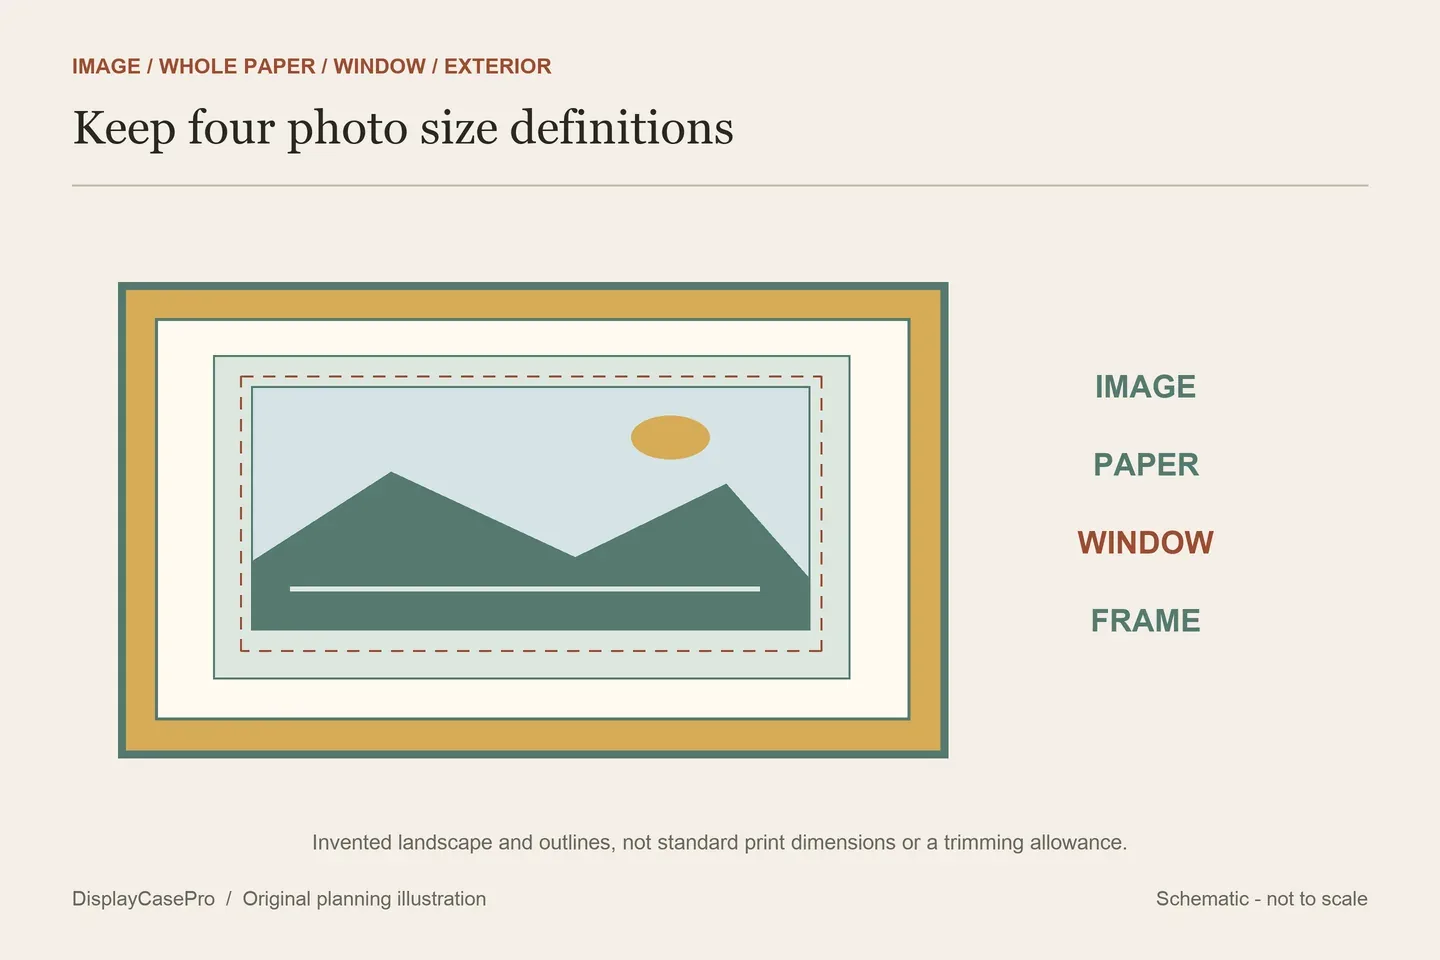
Keep the image, paper, window and exterior separate
Lay out the dimensions in the intended orientation. Measure the full paper and identify where the printed image ends. Mark any white border, title, signature or edition number that belongs in the finished view. A nominal print size might refer to the paper, an image area or a seller’s recommended opening.
| Boundary | What it describes | Check against |
|---|---|---|
| Printed image | The picture area, including details near its edges. | The crop and border you approve. |
| Whole print | The complete physical paper or existing supported object. | The receiving mount and order’s definition of art size. |
| Visible window | The part exposed inside a mat or frame lip. | Faces, horizon, signature and intentional margins. |
| Finished exterior | The assembled frame’s outside footprint. | The wall, shelf and hanging plan. |
The distinction is especially clear in Noelle Phares’s guide for her own art prints: her listed size, actual paper and image area differ. Those measurements are not photographic size standards, but they show why you should confirm a supplier’s sizing convention rather than enter whichever number appears on an invoice.
Approve the opening before committing to the frame
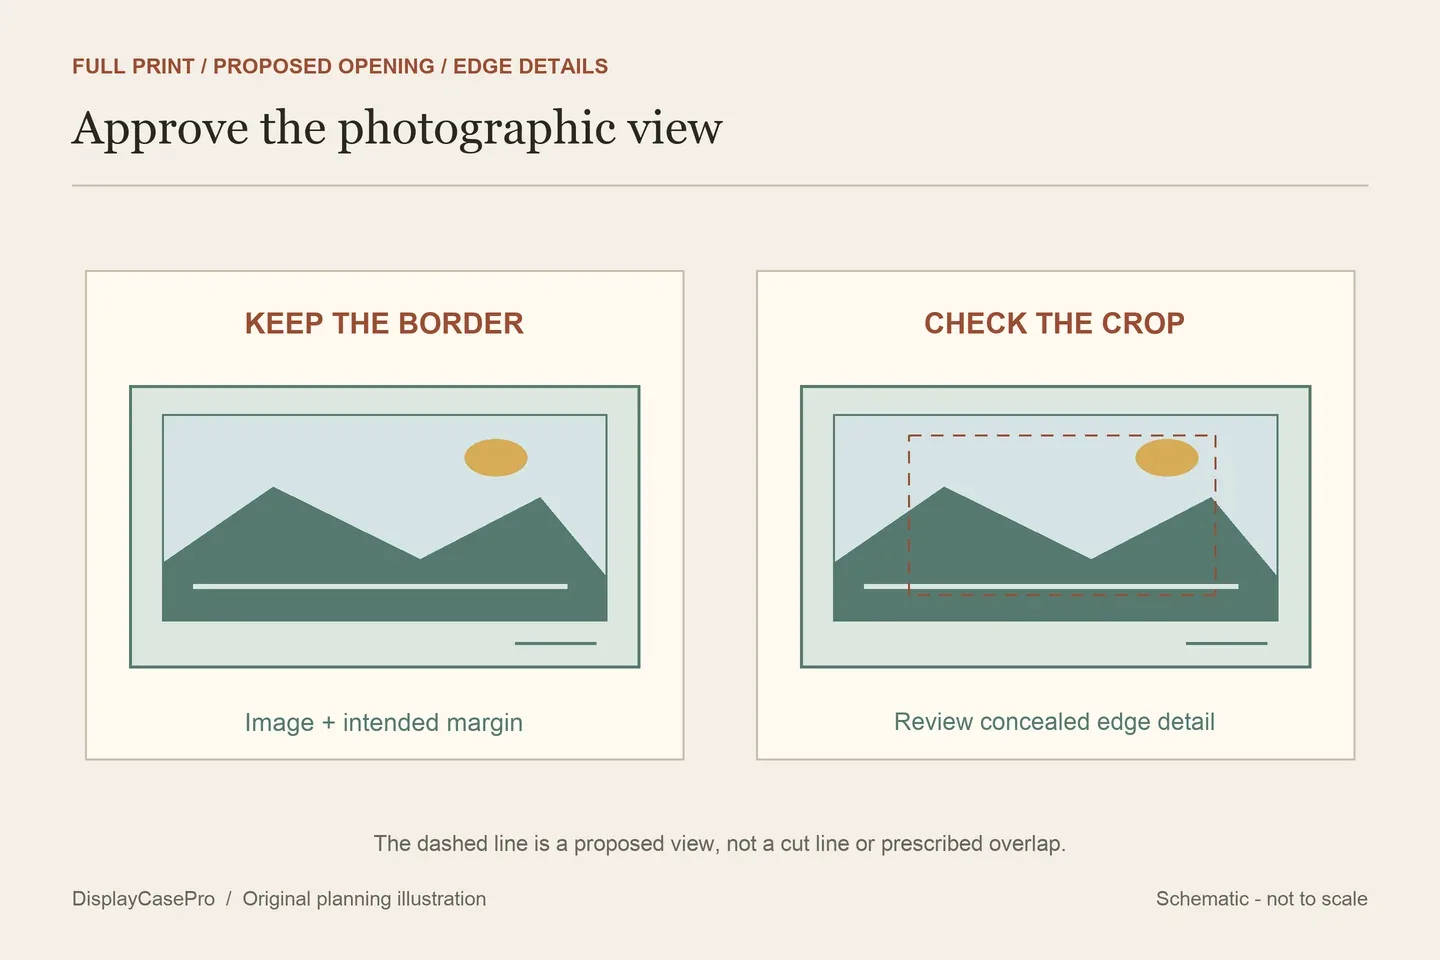
Use a reference image or a non-contact layout proof to compare a visible mat border, a supported exposed-paper view and a narrower no-mat appearance. Check details near every edge, not only the center. Include a signature line in the proof if it sits outside the image.
An opening may hide some paper while retaining the complete printed picture. With an edge-to-edge photograph, the same opening could conceal image detail. Decide whether that loss is acceptable before purchasing a preset mat. A different window or frame can preserve the print without trimming it.
Robyn Withawhy’s illustration-framing tutorial makes the outer mat and smaller window distinct. Its ordinary card, masking tape and cutting routine describe her decorating project; they do not establish suitable contact materials for your photographic process.
Specify materials for a photograph, not just a color scheme
Ask for the actual mat, backing and attachment materials. The National Archives specifies mat board that has passed the Photographic Activity Test when framing photographs. An “acid-free” label is not the same evidence. It also calls for a window mat or spacers that keep glazing off the original surface.
Choose a support and attachment approach suited to the print and its intended future removal. Corners or other non-adhesive supports may be an option to discuss; adhesive hinges, existing bonded boards and floated sheets require their own decisions. An artist’s instructions for taping all sides of a supplied reproduction do not automatically apply to an original photograph.
| Print state | Bring to the framer | Settle first |
|---|---|---|
| Original with collector or family value | Known process, condition and any reverse information. | Appropriate contact materials and later removal without an improvised permanent bond. |
| New display copy | The printer’s paper, finish and handling information. | Approved crop, compatible support and whether replacement is intended. |
| Mounted photo | The existing board and any maker’s framing directions. | Receiving depth and retention for that object, rather than removing the mount to fit a thinner frame. |
Style can then be reviewed with real samples. Biltmore’s suggestions include layered mats, bottom weighting and different reflection-control appearances. These are design choices. Compare visible detail and reflections in the intended room instead of treating a preferred color or finish as a preservation requirement.
Fit the complete agreed package
For a supplied frame kit, check its exact component order, receiving dimensions and closure instructions. Prepare the frame and clean the glazing separately using its maker’s directions. Handle a loose photograph by its edges, keeping fingers and tools off the image surface.
Check the chosen window and the assembled depth before closing. A no-mat appearance still needs a resolved support and glazing relationship. Use the usable frame-depth guide if the mount or an existing board changes what the surround must receive.
The Ansel Adams Gallery’s presentation guide discusses mat colors, glazing and hanging arrangements. Keep those aesthetic suggestions separate from your exact glazing specification and light exposure plan. No product name establishes an indefinitely safe sunny position.
Keep the print and framing details together
The photograph framing record keeps the print process, full paper, image, window, contact materials and finished exterior separate. Save the approved crop proof and supplier’s instructions with it.
This guide concerns physical printed photographs, rather than camera composition or adding borders in an app. No photographic print, mount or frame was physically tested for this article.
Comments
Share a display tip or ask a question.