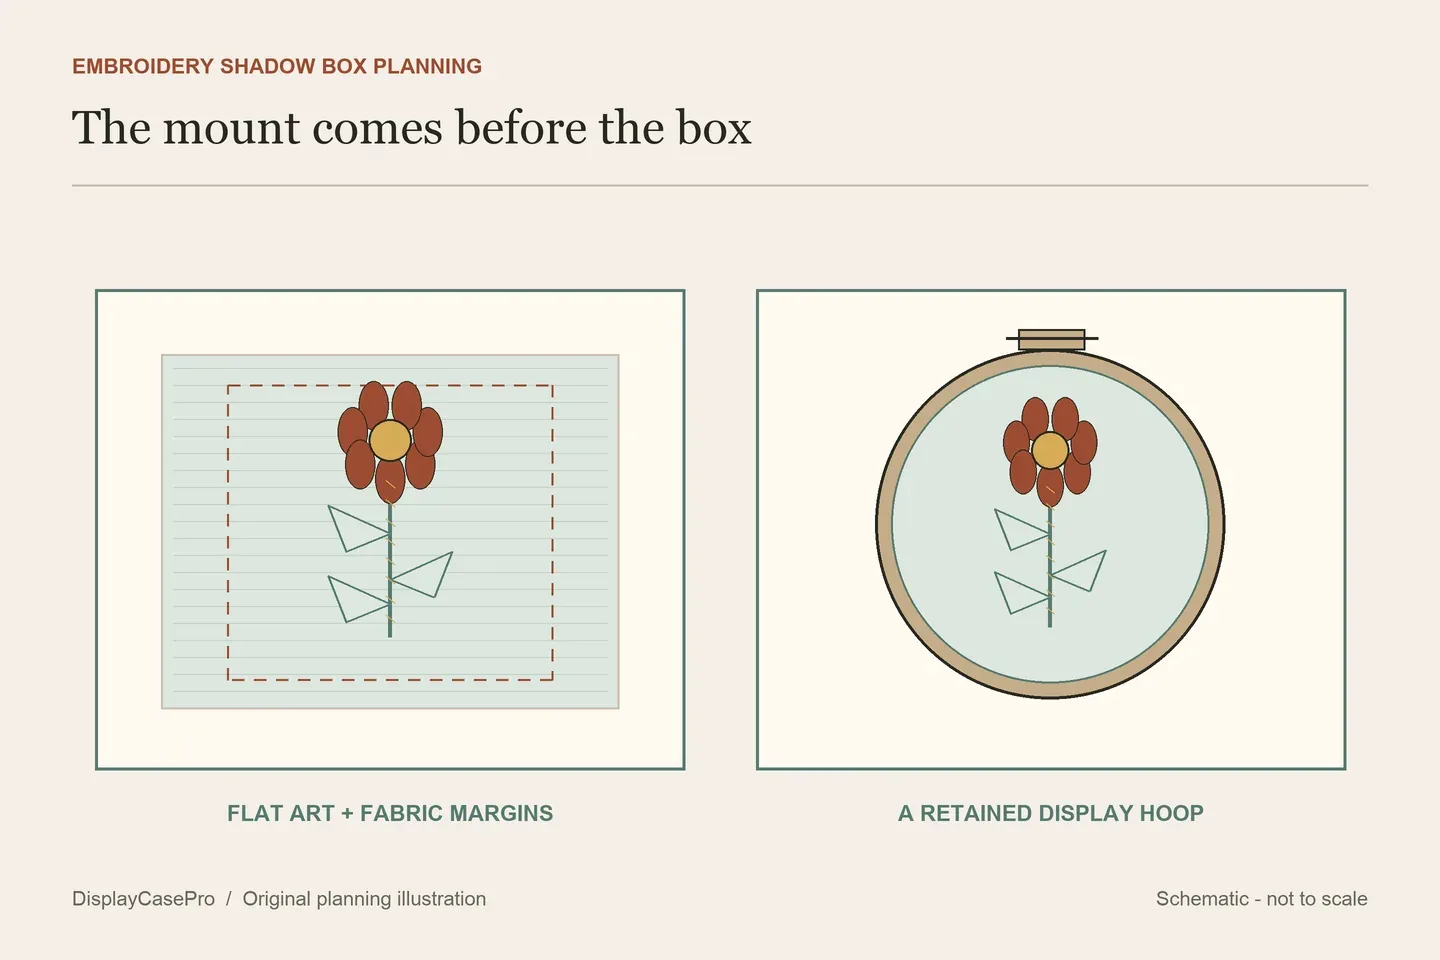
Display embroidery in a shadow box by planning the finished mount before choosing the box. Keep the ground fabric supported, preserve the margins needed by the mount, and measure above the highest stitches, beads or raised elements. The frame's visible opening, the fabric size and the mounted depth describe different parts of the job.
Identify the kind of work you are framing
Begin with a reference photograph and a description of the existing piece. Record the ground fabric, threads, beads or other materials where known, its condition and whether it is already mounted. A flat stitched sampler, a beaded panel and a layered organza scene need different support and depth decisions.
| Work to display | First support question | Depth question |
|---|---|---|
| Flat stitched artwork | How will the whole ground fabric be supported without distorting its design? | What space is left over the stitches after the backing and mount are installed? |
| Raised embroidery, beads or stumpwork | Which parts carry the textile and which raised parts need independent consideration? | What is the furthest projection in the intended presentation? |
| Embroidery retained in a display hoop | Is the existing hoop and fabric arrangement suitable to remain, and how will it attach to the box? | Include the complete hoop, screw, back folds and front details. |
| A newly constructed layered scene | How will each panel and its supporting structure be assembled? | Include every layer, separation and support before checking the front. |
Keep a fragile, damaged or historically significant piece's condition ahead of an intended frame style. Mounting an existing textile is a separate decision from making new artwork to suit a box. Do not remove an old backing, iron unknown materials or wash the work merely to make the framing process resemble a craft tutorial.
Choose support appropriate to the actual textile
The Canadian Conservation Institute's small-textile mounting note describes a prepared, fabric-covered rigid support and stitching suited to the textile's construction and edges. It calls for specialist advice for soiled or poor-condition textiles. That provides a useful starting point for discussing a sound flat embroidery with a textile framer; it does not specify support for every heavy bead or projecting stumpwork form.
Ask for a written mount plan: the support material, contact fabric, attachment to the textile, attachment to the box and later removal. A description such as “acid-free board” identifies one component, while the complete assembly still needs to be resolved.
A prepared flat support
This route can present the design as a picture while carrying the ground fabric across its area. The support needs to suit the piece's condition, weight and stitching. Discuss any distortion with the framer rather than pulling the fabric harder until the picture looks square.
A retained hoop
A display hoop can remain part of the intended appearance, but its outer profile and attachment need their own plan. Do not assume it can simply be wedged between the back and the glass. Consider whether the fabric's tension and folded reverse are suitable, particularly for an older piece or one with fragile edges.
A designed three-dimensional assembly
For newly made dimensional work, a box may be part of the artwork from the start. The Embroiderers' Guild of America includes shadow boxes among its display formats and highlights planning the final use early because some finishes need larger fabric pieces. Make the intended assembly and materials explicit before stitching or trimming.
Separate the design, fabric and visible opening
Record three outlines on a reference image or paper plan:
- Stitched design: the outermost embroidery and any signature or dated inscription you want to show.
- Complete ground fabric: the textile that exists, including its unstitched margins and irregular edges.
- Proposed visible opening: the area revealed by the mat and frame after mounting.
A piece described as “8 × 8” may refer to a design, a cut fabric square, a support or a nominal frame format. Ask which one. Leave the mount's required fabric margins intact; a larger external frame cannot restore fabric trimmed away before the support was planned.
For a new project, use a paper mock-up to check the composition, margins and planned mount before committing to the final fabric size. For an existing piece, adapt the opening and support to what survives. A signature near an edge may need a different window from a centered decorative motif.
Beth Colletti's framing tutorial illustrates one specific contemporary project using a shadow-box-style frame, self-adhesive board and folded fabric edges. Its stated heat setting, tape and board thickness belong to that project. For an existing collectible or a different fabric, obtain a suitable mount rather than transferring those preparation steps automatically.
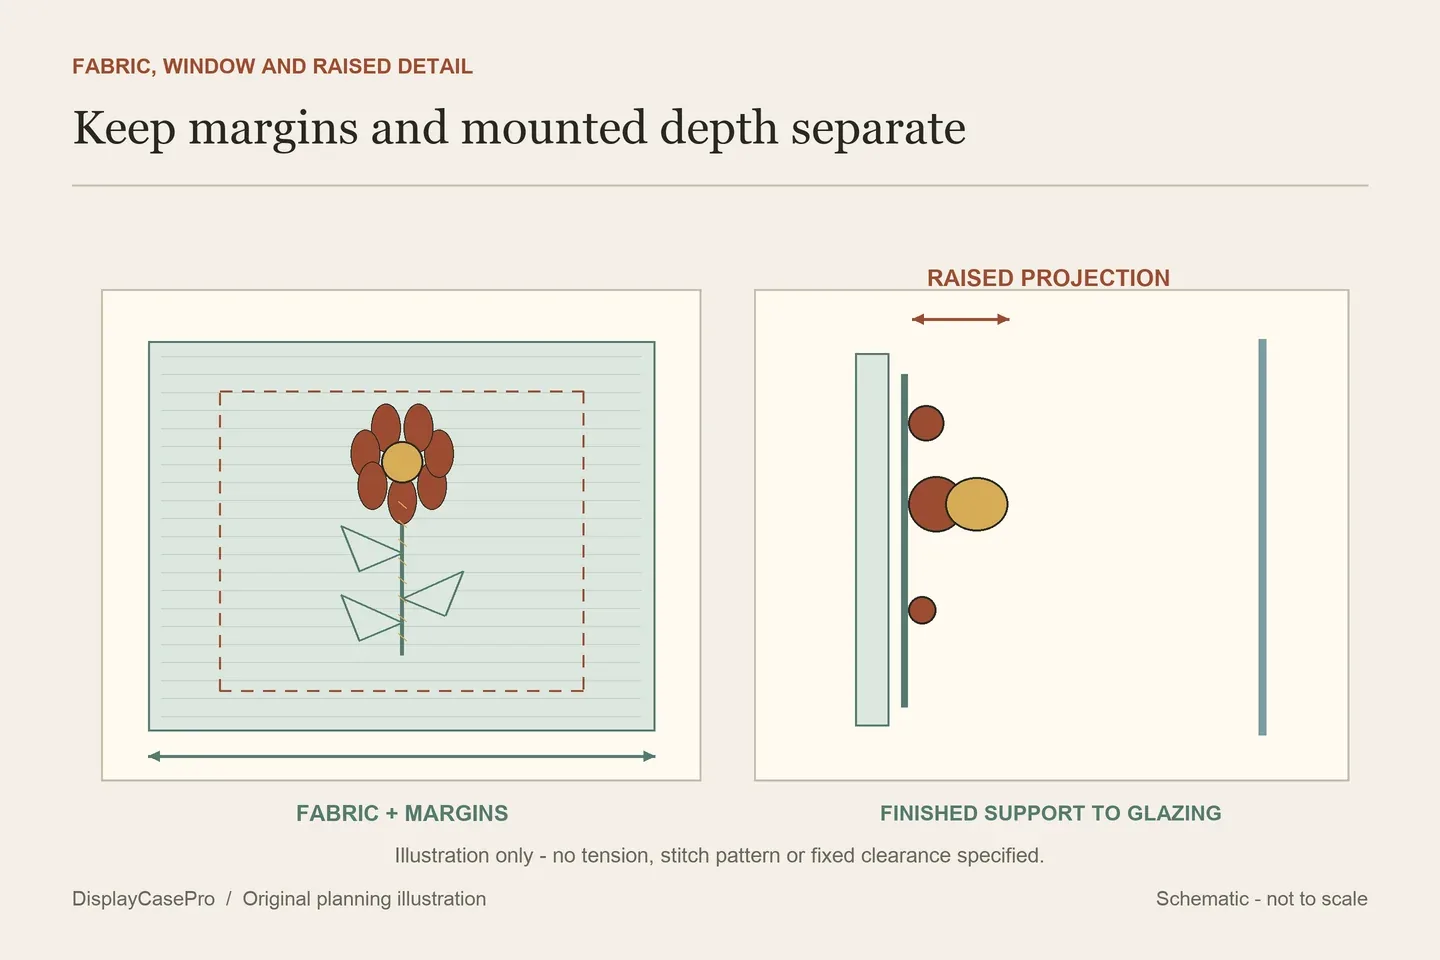
Measure above the finished support, not an empty back panel
Include the support, padding or retained hoop in the assembled profile. Then measure the highest front detail from the finished support surface. Knots, beads, padded petals, wire-supported elements and folded fabric on the reverse can each change the depth requirement.
The inner glazing should clear the work in its intended position. Do not use the front panel to flatten a raised stitch or hold a projecting part in place. Resolve the mount or choose another box if closure would rely on pressure.
A layered scene requires more than the height of its frontmost embroidery. Include each supporting panel, its frame or spacer and the intended separation between scenes. Check the complete arrangement from the viewing position as well: an attractive depth effect should not hide the subject behind a support.
The Urban Threads organza project builds several embroidered layers into an intentionally constructed scene. ZEEBAM's dimensional project describes planning a canvas, foreground pieces and supports around a particular box. These illustrate why layer order and rear access need planning. Their glue, cutting, painting and washing steps are creative construction choices, not instructions for modifying an existing heirloom embroidery.
Use the usable shadow box depth guide for the general reference surfaces. Record the actual completed mount here; a nominal outside depth does not establish clearance above its raised details.
Review the assembly before closing it
- Verify the intended view. Check design edges, signatures, layers and captions against the planned opening.
- Verify support. Confirm the complete ground fabric and any separate projecting components are supported as intended.
- Inspect the reverse arrangement. Make sure fabric folds and fittings do not obstruct the back or require compression to close.
- Check front clearance. Follow the frame's closing procedure without allowing glazing to bear on the work.
- Record access. Note which panel releases, how the mount comes out and where it will be supported during removal.
The textile display discussion in PieceWork uses an older family object to show why attachment, material contact and reopening matter. Keep those questions in your own plan. A finished shadow box is an assembly you should understand, not a reason to forget the textile's condition.
Download the blank embroidery framing worksheet. Keep the fabric, design window, mount, raised projection and opening route in separate fields, and save a reference photograph with the record.
Common questions
Can an ordinary picture frame work?
It depends on the complete mount and the work's projection. A mat or spacer can be part of a planned assembly, but a flat-image frame label alone does not establish clearance for raised embroidery.
Should I trim the fabric to the visible opening?
Plan the mount first. Unstitched fabric can be needed for support and attachment, and the visible opening can be smaller than the textile behind it.
Can I keep the embroidery in its hoop?
Resolve the hoop's suitability, tension, attachment and complete depth for that work. A hoop's circular outline does not by itself provide a shadow-box mounting system.
Comments
Share a display tip or ask a question.