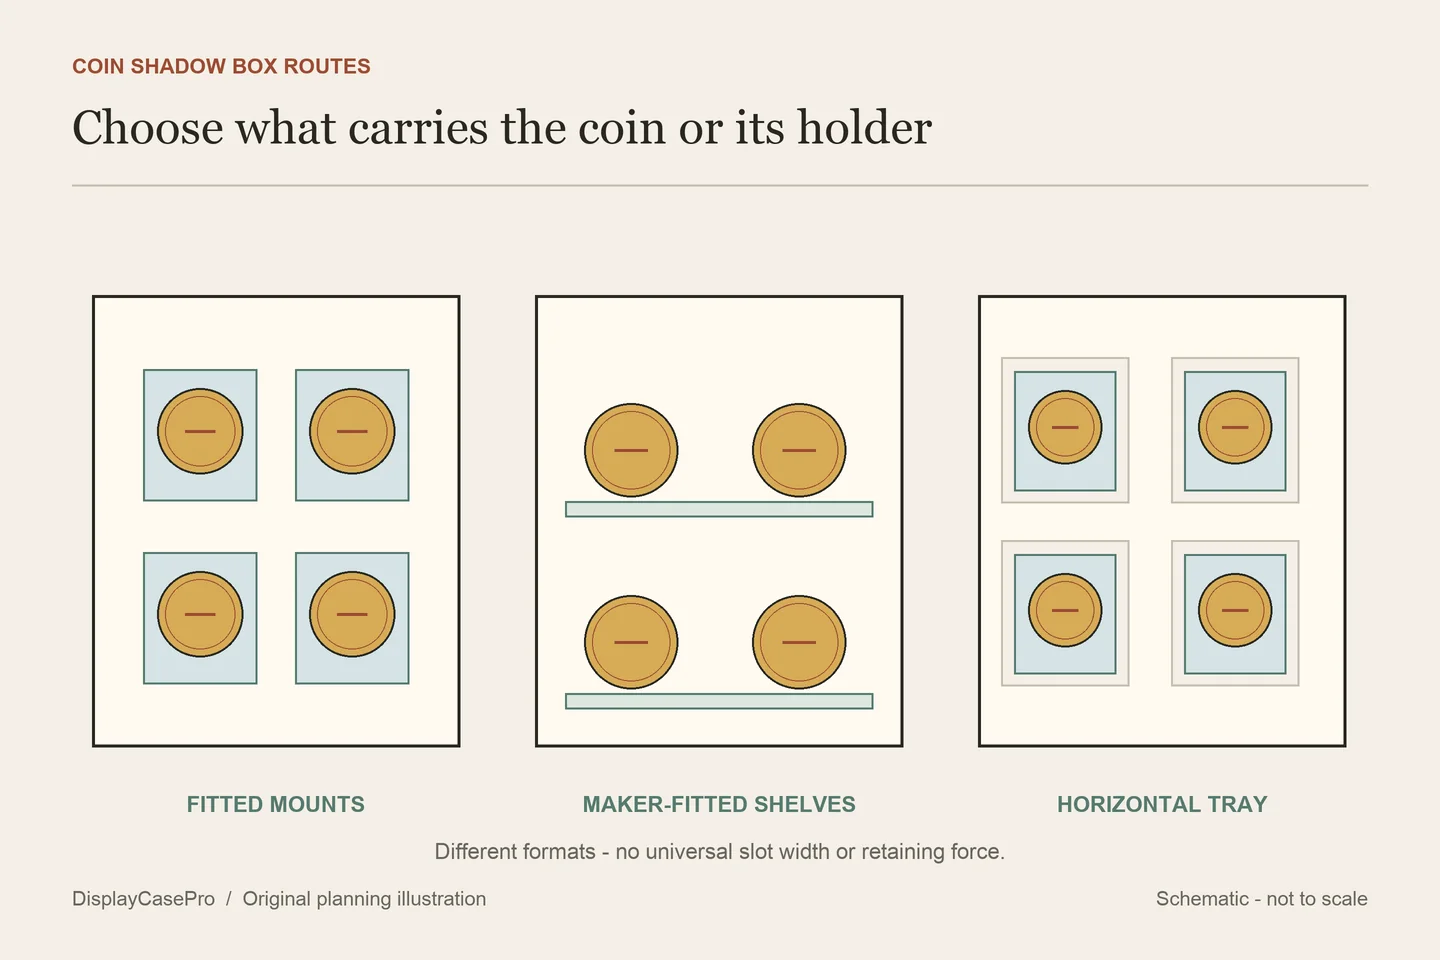
To display coins in a shadow box, choose how each coin or existing holder will be supported, decide which face should be visible, and check the release route before arranging the group. A fitted holder board, maker-designed coin shelves and a horizontal tray offer different ways to retain the collection. The frame back and front glass should not become a clamp for loose coins.
1. Keep the coin and its existing protection identifiable
Inventory the pieces before opening packages or removing anything from a holder. Circulating coins, proof issues, medals sold as collectibles and modern challenge coins can have different shapes, finishes and packaging. The word “coin” does not establish one diameter, thickness or appropriate contact material.
Record the maker or issue as documented, any existing capsule or slab, and the face you want to show. Retain identifying labels, certificates and packaging with the matching record. A sealed grading holder can remain part of the display; removing it simply to fit a shallow frame creates a different project.
The U.S. Mint's coin-care guidance discusses original holders, careful handling by the edges over a soft surface, and the possibility that cleaning or polishing reduces value. Making coins shiny is not a necessary first step in this display plan. Resolve condition or treatment questions separately.
For a modern challenge coin, keep raised designs, colored areas and irregular edges in the record. Ask the maker about care for the actual finish when necessary. A method described for an ordinary flat coin may place pressure on the relief or decoration of another piece.
2. Choose a support route before arranging the rows
A board with fitted coin or holder mounts
A purpose-made mount can attach to the shadow-box backing while supporting a coin or its existing holder. Establish whether the fitting receives the bare coin, a capsule or a slab; those are different outer profiles. Check how it attaches to the board and how the object can be removed.
For a concrete example, Frameware's Mighty Mount Coin Holders are described as polycarbonate devices placed through mat board and backing. The listed choices include Penny, Nickel, Dime, Quarter and Dollar. Those names do not prove compatibility with every coin carrying the denomination, every country or an added capsule. Obtain the exact size and board requirements for the fitting you intend to use.
Maker-fitted shelves or grooves
A shelf can carry a row of coins in an intended leaning orientation. Shadowbox Guru's Challenge Coin Shelves use an angled slot and are offered as add-ons to that maker's boxes. The page lists shelf-length options, but not one universal groove width for all coins.
Check your thickest edge or holder, the contact with the backing, the supported lean and the route out of the slot. A grooved shelf made for bare challenge coins may not receive capsules. Keep larger or unusually shaped pieces in separately suitable positions rather than forcing them into a regular row.
A horizontal tray with individual holder positions
For a tabletop box designed for horizontal use, individual supported positions can show coins from above. This can suit an arrangement where the existing protective holders remain intact and easy to identify. Check how the tray and its contents stay in place when the cover is removed.
Horizontal support does not establish vertical retention. Before converting the arrangement to a wall display, obtain a retaining system suited to the protected pieces and the board. A photo of a neat flat layout does not answer that change of orientation.
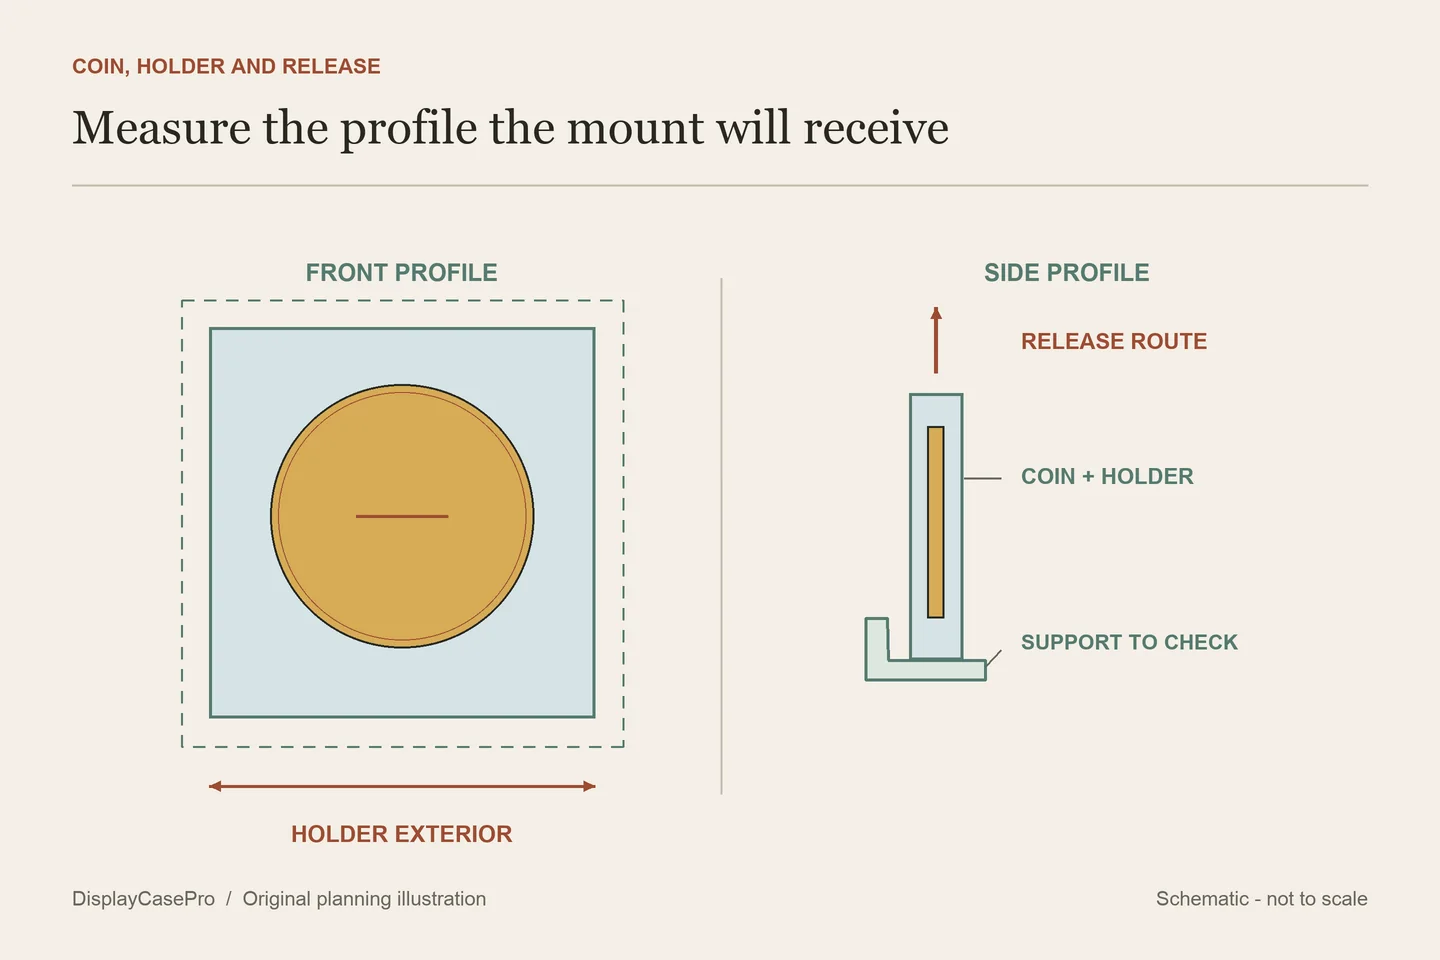
3. Measure what the mount will actually hold
| Display state | Profile to measure | Extra fit question |
|---|---|---|
| Bare round coin | Actual diameter and full thickness, including relief | Where do the support and retainer contact it? |
| Coin in a capsule | Capsule outside width and thickness | Is the mount specified for the capsule rather than the coin? |
| Coin in a slab or card holder | Complete holder, label and any protective sleeve | Can both the label and chosen face remain visible? |
| Irregular challenge coin | Widest outline, projecting design and edge thickness | Does its actual base or edge suit the proposed slot? |
Include the fitting, shelf or stand when checking the assembled depth. A tilted coin occupies a different profile from a flat one. Ask for clear space from the mounting surface to the inner glazing, not only the frame's outside depth. The usable shadow box depth guide explains the distinction.
For a repeated row, compare neighboring outlines as well as individual fits. A large capsule can cover the label below the next position, and an irregular edge can interfere with a shelf divider. Count confirmed usable positions instead of assuming that an advertised coin count applies to your mixture.
4. Decide how the front, reverse and labels will be seen
A wall shadow box normally prioritizes one view. Select the face that tells the intended story and record that choice. If the reverse matters too, use a separate clearly labeled photograph, a removable supported holder or another format that permits the desired view. A mirror behind a coin does not guarantee a readable reverse from the normal viewing position.
Give every position a code tied to the inventory. Group by a documented series, place of acquisition, event or another relationship that you can explain. Visual order need not imply rank, service history or a chronology that the records do not support.
Keep a short caption near each piece or a numbered key alongside the group. Leave the detailed story in the catalogue. If the display includes a photograph, badge or flag, support it separately so it does not carry the coins or press against their holders.
Make a paper map of the supported profiles before loading the case. Mark the selected face, label area and removal route at each position. A coin that is temporarily taken out can then return to its recorded place without rearranging the whole display.
5. Load the display and verify release as well as retention
- Prepare the empty system. Follow the exact backing, fitting and case instructions before bringing the collection into the work area.
- Check uncertain fits. Resolve a tight capsule, unsupported edge or unclear retaining part before loading that position.
- Place one supported item at a time. Keep the corresponding record code visible and avoid sliding coins against each other.
- Verify the release route. Make sure the intended fitting or holder can be reached without levering against another coin.
- Close gently. Check that the front clears the complete display and does not stop against a raised face or holder.
- Check the finished orientation. Use the model's instructions and suitable assistance for placing or hanging the loaded case.
Download the blank coin support and face worksheet. It keeps the coin, holder, mount, chosen face and release method connected. Revisit the record when a new holder changes the dimensions or when the arrangement moves from a table to a wall.
Common questions
Can I glue the coins directly to the backing?
Choose a suitable support and retaining system first. An adhesive attachment can obstruct the reverse and complicate removal. A product's mount or shelf should explain what carries the object without requiring glue on the coin itself.
Will a dollar-size fitting hold a challenge coin?
Compare the exact dimensions and contact requirements. A denomination label is not a universal physical standard for every country, date, souvenir or protective holder. Confirm with the fitting supplier rather than adapting the coin to the mount.
Can a closed shadow box prevent tarnish?
A transparent cover does not establish the enclosure's air exchange, material compatibility or interior conditions. Treat access protection and collection-care requirements as separate checks. Avoid adding an unplanned chemical, loose desiccant or cleaning treatment as a substitute for that assessment.
Comments
Share a display tip or ask a question.