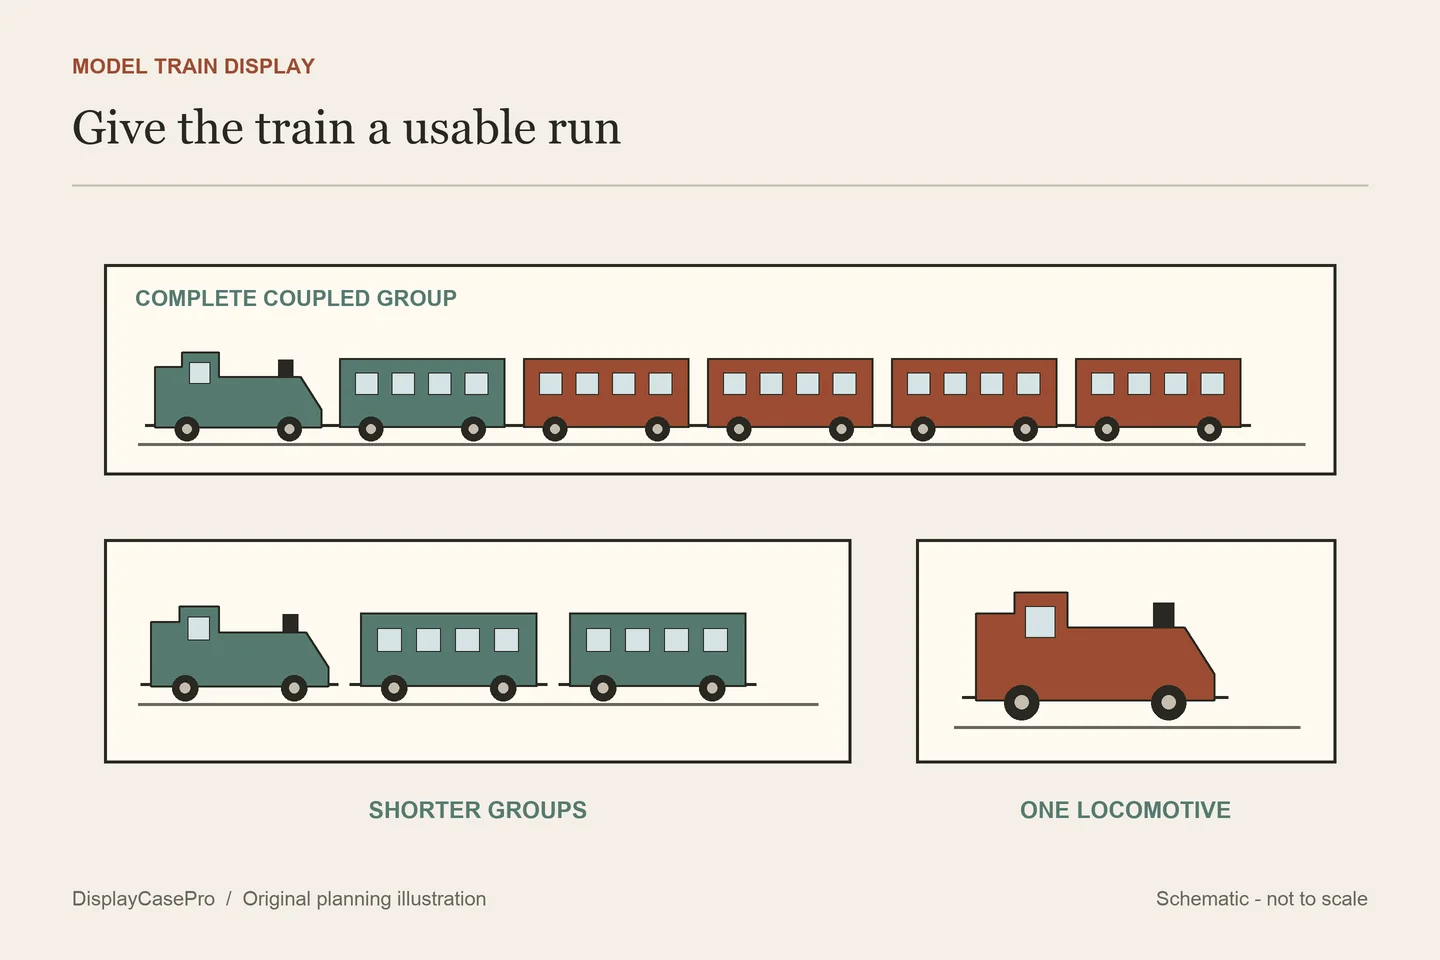
A model train display works best when the arrangement follows the train. A single locomotive needs a clear view of its details; a coupled passenger train needs a long, usable run; a changing fleet needs accessible rows. Choose that arrangement first, then match the wheel support, clear opening and removal route to the actual models.
Four model train display case ideas
Decide whether a visitor should read the collection as complete trains, individual models or groups with a shared story. This choice determines the row length and label positions more usefully than a promised number of trains.
| Layout | How to use it | What to resolve |
|---|---|---|
| One complete consist | Show a locomotive and its connected cars in their documented or chosen order on one continuous run. | The coupled train’s end-to-end length, support continuity and access to the end vehicles. |
| Short train groups | Give each locomotive and selected matching cars a separate row or bay. | Which models belong together, where a group ends and how another model is removed. |
| Locomotive study | Give one model, or a small comparison, its own case with the relevant side facing the viewer. | Visible cab/number details, projecting parts and the full supported profile. |
| Fleet rows with rotation | Arrange models by a recorded theme, keeping a position map for items moved to an operating layout or storage. | Repeatable access and a clear record of each model’s current location. |
A complete train as the focal display
A long run makes the relationship between vehicles easy to read. Include the tender or other permanently associated vehicle in the plan, and decide whether the train will be displayed coupled. Do not add bare body lengths and assume the sum is the connected length: couplers and the gaps in the chosen display state also occupy the run.
If the available case interrupts that run, make the division deliberate. Two labeled groups can show a locomotive and representative cars without suggesting that an incomplete train is a complete historic formation. Keep any uncertainty about the formation in the caption.
Short groups for a varied collection
Shorter rows help when passenger cars, compact locomotives and unusual vehicles share a cabinet. Group by a documented operator, model series or collecting theme. A simple row label can carry the theme; individual model records can stay elsewhere. Plan around the longest group in each row rather than repeating an arbitrary car count.
A single locomotive with breathing room
A focused case suits a model with one particularly interesting side or a personal connection. Place its label where it does not cover wheels or running gear. If a nameplate, presentation base or separate information card is included, lay those out alongside the model before ordering the enclosure.
Accessible fleet rows
For models that leave the display regularly, use a row map such as A-01, A-02 and B-01. Record the model identifier and any associated cars at each position. Leave the record attached to the position when a model moves, so a temporary gap is easy to understand and the model can return to its intended place.
Check whether the case uses rails or flange grooves
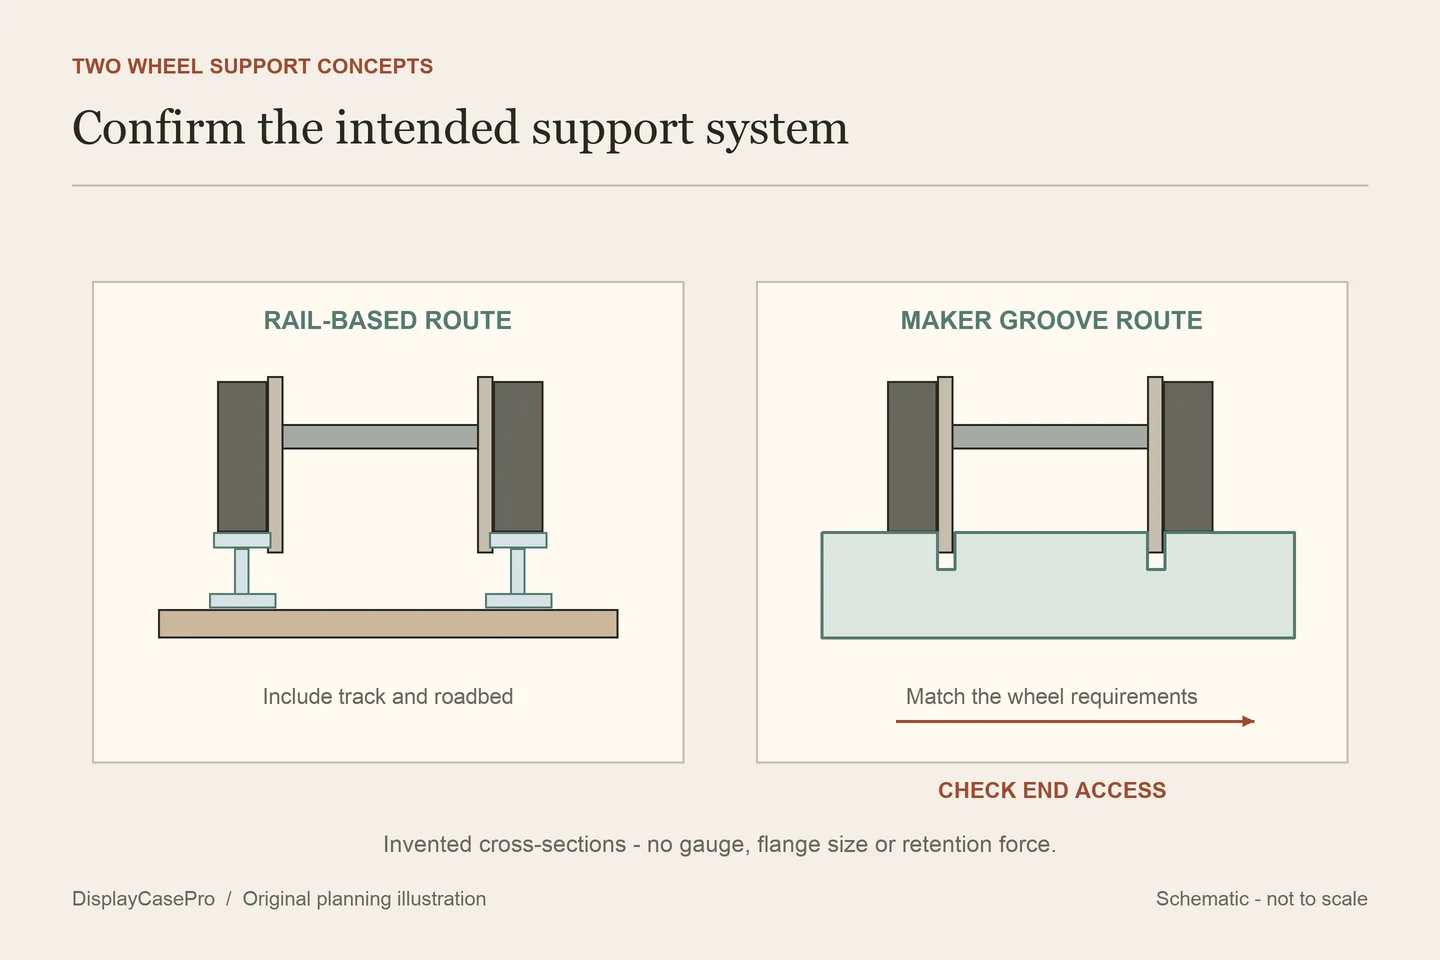
A flat shelf, a shelf carrying model track and a purpose-made grooved extrusion are different support arrangements. The case’s scale label does not answer which one it uses. Ask how the wheels sit, whether track is supplied and whether the chosen model is compatible with that support.
With a track-based display, include the actual track or roadbed in the supported height and width. With a maker-designed groove system, confirm the relevant wheel/gauge requirements with the maker. Do not add rail on top of a groove system simply because both products are described as HO.
Also establish how models are kept from rolling or leaving their intended positions during normal access. A shelf lip, groove or separate stop may perform a different job in each case. Its presence alone does not tell you the restraint method for a particular model. Resolve this using the display and model instructions before loading the row.
Read usable space separately from the case’s size
Two current maker pages show why the labels beside the numbers matter. These are published specifications, not measurements or fit tests by DisplayCasePro.
| Named source | What the page states | What to confirm for your train |
|---|---|---|
| Showcase Express Series 2000 | 2.16 in inside depth and 3.20 in front opening; wheel-flange grooves; windows inserted from the side and snap endcaps. Sections can be connected or cut. | Continuous usable run after the chosen ends/connectors, actual model compatibility and the space needed beside the case for access. |
| sfDisplay HO cabinet, dc7036b | Six rows; a slight shelf lip; a 19.5 H × 37.5 W × 2.5 D in dimension line and 2.75 in shelf spacing. | Clear interior run/depth and actual door opening. The dimension line is not labeled clear inside size; shelf spacing alone does not define the admission opening. |
Keep the axis order and units with every saved specification. Use a separate field for a missing figure rather than filling it with a subtraction based on photographs. A scale category is a useful starting filter; the complete supported train and the specific case resolve fit.
Make a train-to-row plan
- Identify the display state. Record the model, its stated scale, associated vehicles and the chosen coupled or separated arrangement. Keep transport or storage configurations distinct.
- Record the complete supported outline. Include the chosen track/base and relevant couplers, handrails, roof equipment, pantographs or other projections in the intended display position. Follow the model’s handling instructions; do not force delicate parts into a smaller outline.
- Check the continuous run. Match each complete train or short group to a clear row length. Note any connector, divider, stop or end fitting that changes that space.
- Choose the viewing side. Check that the intended number, livery or detail is visible past the frame and support. Place record cards in their own space.
- Write the removal sequence. Record whether vehicles can leave individually or whether adjacent items must move first. Confirm the route before filling the row.
Use the collection measurement guide for the general envelope method. Add the train-specific fields in the blank model train display worksheet: connected order, wheel support, row position, end access and unresolved maker questions.
Leave room for the opening and retrieval task
A case may fit the wall while its opening system does not. A side-sliding window needs its intended extraction route. A hinged door needs its swing. A lift-off cover needs a clear path away from the models. Check these movements at the intended location using the empty case or the maker’s dimensions before introducing the collection.
Within a row, confirm the access described by the model and case makers. Avoid an arrangement that requires pulling on a coupler, roof detail or projecting component just to reach the model. If the support or door geometry prevents suitable retrieval, change the arrangement or case rather than treating the obstruction as spare capacity.
For a wall case, follow the case maker’s installation and loading requirements for the actual wall. A published empty-case weight does not establish a loaded rating. For visibility after installation, the separate display cabinet lighting guide explains how to plan the view and access.
Common planning questions
Can locomotives and cars of different scales share a cabinet?
They can be considered as separate display groups, but each needs a compatible support and clear profile. An adjustable shelf does not automatically make its grooves, rails or opening suitable for every group. Record the support system for each row.
Should the whole train stay coupled?
Keep it coupled when that supports the story and the chosen display permits suitable support and access. Separate groups are a useful alternative when the full run is unavailable. Identify the intended arrangement so its meaning survives a later reorganization.
How many models will a case hold?
Count only after mapping the actual groups to usable runs. Car lengths, couplers, support and retrieval vary; a count based on one small model cannot describe a mixed fleet.
About this guide: This is a static-display planning guide based on the named maker pages. It contains no operating railway instructions, construction cut list or independently tested case capacities.
Comments
Share a display tip or ask a question.